Tuesday, December 15, 2009

Deeeaaar Santa...


Santa: Ho! Ho! Ho! Merry Christmas!

Me: {a little shy walking to sit on Santa's lap}

Santa: And what is your name young lady?

Me:  Angela.

Santa:  Have you been a good girl this year?

Me:  I like to think so.

Santa:  What would you like for Christmas this year?

Me {thinking}: Man... he just opened a big can of worms... didn't he?


Well....

Pretty much anything made by Moda... OF COURSE! 


and I will pretty much take anything by Sweetwater, Bonnie and Camille, and BasicGrey.

These by David Walker...


Oh... and I must not forget about these...


As for patterns...


Oh... and I would love to have all the patterns designed by Izzy and Ivy Designs.
I think that would do.

I promise, Santa, I have been a VERY GOOD GIRL!

Pecan Chocolate Chip Cookies


This Chocolate Chip Cookie recipe is D-E-L-I-C-I-O-U-S!
Thank you Amy Tyler for allowing me to share your recipe on my blog.  Amy is a very good friend of mine and a wonderful mother.  She just started sewing about a year ago {her hubby bought her her first sewing machine for Christmas last year} and is having a blast.  Amy has two little ones about the same ages as my kids and they love playing with each other.  Amy... Thank you for being such a cherished friend!

Okay... on to the Recipe....

INGREDIENTS:
1 cup (2 sticks) Butter, softened
3/4 cup Granulated Sugar
3/4 cup packed Light Brown Sugar
1 Tablespoon Vanilla Extract
2 Eggs
2 1/4 cup All Purpose Flour
1  teaspoon Baking Soda
1/2 teaspoon Salt
2 cups Hershey's Milk Chocolate Chips
1 cup chopped Nuts (pecans)
1 (4 oz) package Instant Vanilla Pudding Mix


INSTRUCTIONS:
1. Heat oven to 375 degrees.

2. Blend butter, sugar, brown sugar and vanilla in a large bowl.  Mix until creamy.  Add eggs and beat well.  Stir in gradually flour, baking soda and salt.  Stir in vanilla pudding mix.  Blend together well.  Add chocolate chips and pecans.

3. Drop teaspoon of mix onto ungreased cookie sheet. 

BAKE 12-13 minutes or until edges are slightly brown


YIELD:
A little over  3 1/2 dozen cookies.

Monday, December 14, 2009

A Cookie Exchange... Kate Spain style.

A very good friend of mine and I hosted a cookie exchange yesterday afternoon and it was delicious!


We used plates and napkins from Target designed by the very talented Kate Spain.


A cookie exchange kit from Target. {LOVE this store!}


And we had the MOST DELICIOUS cookies EVER! 

Cream Cheese Apple Cookies {I have to say these were my absolute favorite cookies. I go for pretty much anything with apples... YUMMM!}


Island Cookies... another delicious cookie


Pecan Chocolate Chip Cookies... my husbands favorite!  {Thanks Amy! ;)}


Chocolate Mint Truffles... mmmm.


Not to mention the yummy chocolates that hung about.


For their Christmas gift/party favor... a decorated travel mug that we all used for our Hot Chocolates and Coffee during the party.


Thank you so much girls for coming!  I had a wonderful, relaxing time sharing cookies with you all.  It was just what I needed in this stressful time of year. :)

Check back this week for the recipes to the wonderful cookies shared by my friends.

Friday, December 11, 2009

Christmas Tree Cinnamon Rolls


My mom came up with this idea and shared it with me.  It was such an ingenious idea, that I just had to share it with all of you!  I hope you like it!

Ingredients... one can of Pillsbury Grands! Cinnamon Rolls


Instructions:

Step 1... Pop open the package and place the cinnamon rolls on a baking sheet.

Step 2... Using a sharp knife, cut each roll into fourths.

Step 3... Split the now cut rolls apart and space evenly on your cookie sheet. 

Step 4... Using the specified baking time listed on the package, BAKE.  Because they are much smaller rolls now than originally packaged, the baking time is now cut in half.  For example, if the package says to Bake for 30 minutes, only bake for 15 minutes.  Each oven is going to cook differently so be sure to adjust as neccessary.

Step 5... Remove rolls from oven and apply frosting.  You may need to gently push the little tree rolls back together before frosting.

For a little more sparkle, sprinkle with little green crystal sprinkles to give your trees some color.

An Easy and Perfect treat for Christmas Breakfast... enjoy!

Tuesday, December 8, 2009

MAKE something!

I have made my list and checked it twice...

What are you going to MAKE for Christmas Gifts?

Get your FREE Christmas MAKE List on Moda's website... here.  Just click on the homepage image to download a PDF of the list.

Saturday, November 28, 2009

Sock Monkey Shirt Tutorial


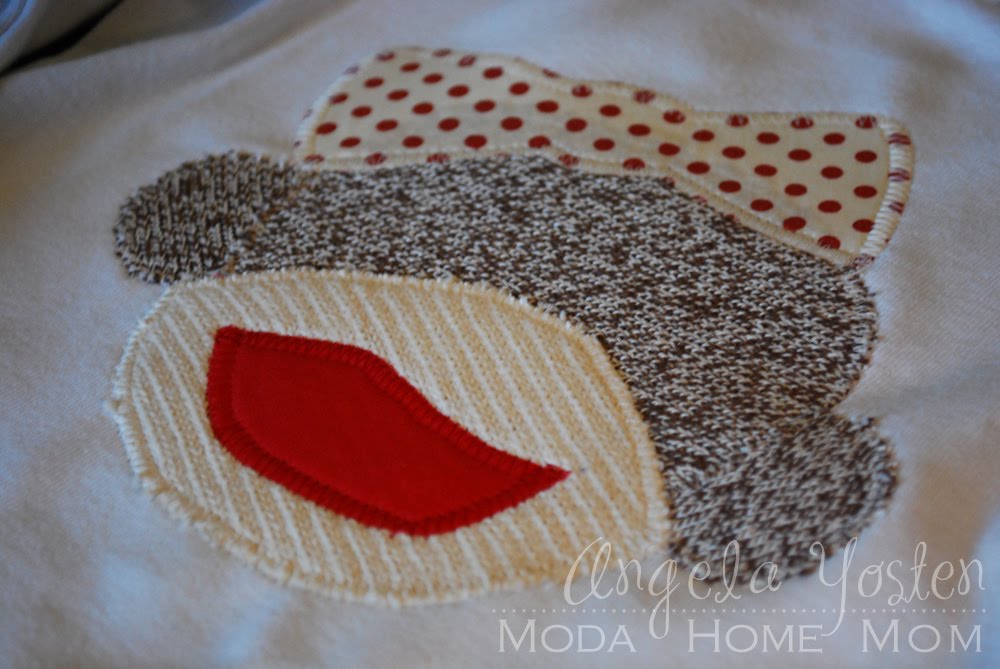
I came up with this applique last year when I decided to make my kids sock monkey shirts. They loved them so much that I had to make them new ones this year along with some matching PJ bottoms with sock monkeys all over them.  So... in the spirit of giving, here is a free tutorial and applique pattern to make your very own sock monkey shirts.

Supplies Needed:

1 shirt for each person.  I like to use, red, white, or brown colored shirts so they coordinate with the monkey.
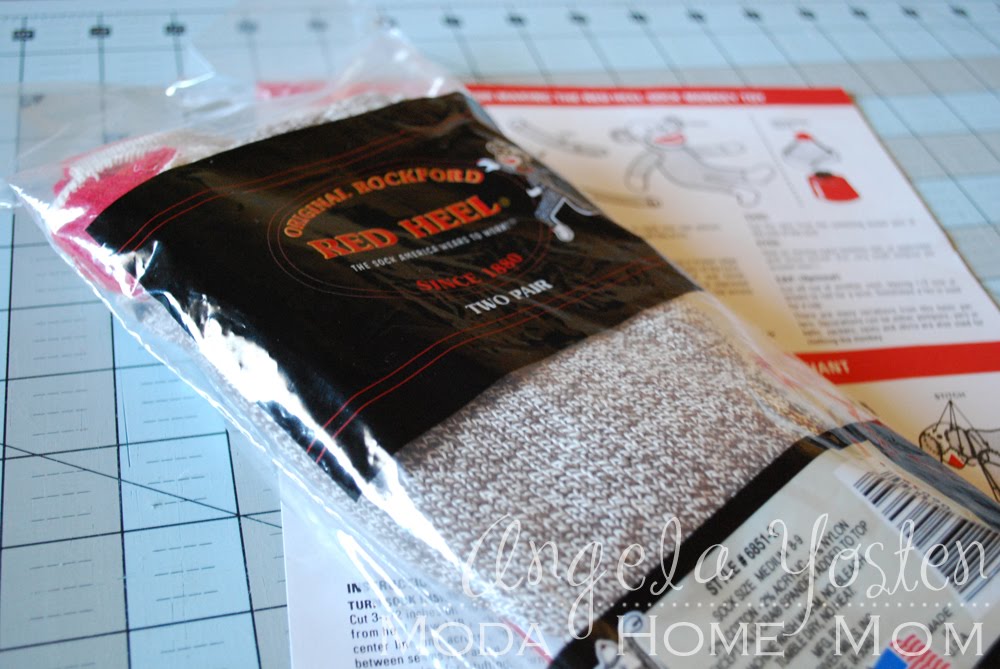
1 package of Red Heel Socks size medium
{The package comes with two sets of socks... you will need 1 sock for each shirt.  Each package will yield 4 shirts or 2 shirts and 1 sock monkey doll. Bonus... free sock monkey doll pattern included in pack of socks}
1/4 yd of Fusible Interfacing... I used Pellon SF-101
1/4 yd of Fusible Webbing... I used Pellon Wonder-Under
Scrap pieces of fabric for your monkey's lips, hat puff, and bow.  Charm Squares work perfectly for these pieces.
Sock Monkey Applique pieces... click here.
2 brown or black buttons for eyes for each shirt. 
Coordinating thread {cream and red}


Instructions:

Step 1...
Cut the sock in half lengthwise down the front of the sock.


Step 2...
Iron-on one side of the fusible web (wonder-under) to the inside part of the sock.


Apply the wonder under to the back side of your scrap pieces of fabric as well for your lips, bow, and/or hat puff.


Step 3...
Print out the Sock Monkey Applique pieces and cut out.


Step 4...
Trace your applique pieces upside down onto your sock and scrap pieces that have been fused with the wonder-under.  Cut the pieces out once you have traced them.


Step 5...
You should now have all your pieces fused with the paper backing still attached and cut out. Lay out your pieces to make the face of the sock monkey.


Step 6...
Remove the paper backing from the brown face and ears and place on the middle front of your shirt.  I like to dry fit with all the pieces on the shirt, then remove everything but the face and ears to make sure I have proper placement.  Iron in place.


Step 7...
Flip your shirt inside out with the backside of the front of the shirt facing up.

Cut out a piece of Fusible Interfacing 8" x 8" square. Lay your interfacing fusible side down centered on your monkey's face.  This will keep the shirt from stretching when you machine applique your pieces.  It will also help stabilize the shirt when washing over and over again.


Step 8...
Using a zig-zag stitch, machine applique your pieces onto your shirt.


Step 9...
Remove the paper backing from all the other pieces and iron in place.  If you are making the boy monkey, leave the red puff off this step.  This will be added later.


Step 10...
Using the zig-zag stitch again, machine applique all the pieces except for the lips in place.


Step 11...
Your shirts should now look like this...


Step 12...
If you are making a boy monkey, now is the time to iron on the red puff in place.
Change your top thread to red. The bobbin thread can stay a cream color.

Still using the zig-zag stitch, machine applique your monkey's lips and hat puff in place.


Step 13...
All you pieces are now appliqued on. Your shirts should look like this...


Step 14...
Hand stitch your button eyes in place to complete the shirt.  The size of the buttons is up to you... you can make them tiny beady eyes your large button eyes... this is where the personality of your monkey comes out.


You now have a classic Sock Monkey Shirt for each of your kids, grandkids, nieces, nephews, friends, etc.


To make a complete outfit... I made some PJ Bottoms using a Moda brushed cotton fabric, Funky Monkey by Erin Michael and the Slumber Buns Pajama Bottoms pattern by The Paisley Pincushion.


Oh... and did I mention that the package of Red Heel Socks comes with a free pattern to make your very own sock monkey doll?  One package of socks will allow you to make two shirts and one monkey doll.


Just think of all the things you can add a little sock monkey applique!


I would love to see your creations you made using my tutorial. Email me a link to your post, flickr, or send me pics!
Related Posts with Thumbnails