Wednesday, January 28, 2009

The Total Package...

Meet Paige...
Paige is a very good girl. She is well mannered, loves to help mommy around the house, listens pretty good most of the time, goes potty like a big girl, does not like to be dirty... my kind of girl.

Meet Matthew...
Matthew, generally can be a good boy. He eats like a big boy, loves to cuddle, doesn't talk much yet.. actually talks another language that only he understands, still in diapers (which that is soon to change), loves to make a mess and get dirty. He is my little cuddle bug, but I could really do without the messy kid in him...

Lately, Matthew has had this thing about taking off all of his clothes and diaper and running around the house naked... What is up with that!?
Well, this morning... that did not change. Paige again, notified me that "Mashoo dressed"... translation = Matthew has un-dressed. SO... on with a new diaper, new clothes... all good.

As I am about to take a break from work to go feed the kids lunch, Paige yells from the hall... "OH NO Mashoo tee tee". I get up from my desk, look down the hall and this is what I see...

WARNING: KIDS... DO NOT TRY THIS AT HOME!

A-A-A-A-K-K-K! YUK-K-K! No... no... no... this did not just happen!

I literally just stood there for a moment gathering my thoughts trying to figure out where to start. Bleh...

Put Matthew in the bath...

Clean the poop from the floor and the wall... 
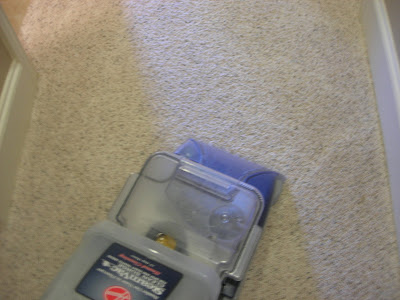
Luckily we have a steam deep cleaner to get it out of the carpet... yuk! Paige was my little cheerleader while cleaning up this lovely little mess. "Good girl Mommy... clean the walls"... she makes me laugh when she repeats stuff like I would say it.
Whew... much better... clean floors once again. For those of you that know me well... you know how much I hate having a dirty house.

Matthew is all clean once again and things are back to normal. I think this shirt was made for him...

Tuesday, January 27, 2009

MBS Update...

Check out the lastest recipe over at the Moda Bake Shop!

Bonnie with Cotton Way and one of Moda's Fabric Designers, has come up with this adorable hot pad tutorial using Deb Strain's Love is in the Air fabric collection. Very quick and simple, make tons of them... even add a cute little applique for an extra bit of flare!

OH... and don't forget to post all your projects that you made from our Moda Bake Shop to our MBS Flickr account... we would LOVE to see what you came up with using our recipes.

Also, Did you know that there are several "Weights and Measures" about the Moda baked goods on the MBS? These guides can be found on the Moda Bake Shop on the left hand side right above the MBS flickr image. Check out the latest addition... Equivelant Measures guide.

Thursday, January 22, 2009

Mmmm.. Mmmm... Good!

We are baking up all kinds of yummy goodness at Moda... and at home. INTRODUCING... The Moda Bake Shop! What's on the Menu? Charm Packs, Layer Cakes, Jelly Rolls, Honey Buns, and OH so much more!

Here are a few recipes that I cooked up over at the Moda Bake Shop and there are even more in the oven just waiting to pop out, so stay tuned!


I got so excited about baking with fabric I even had to celebrate by baking some yummy Nestle Chocolate Chip cookie minis...
Paige even decided to help bake with her cute little honey bun from the Sweet Box.

Start baking today and Enjoy every last crumble!

Monday, January 19, 2009

CONGRATS, Camille!!!!

If you have not been to Camille's blog... wait what am I talking about... everyone know's about Camille... right? Well, in the rare case that you haven't, go check her out! She is awesome! She has just been featured in Australian Homespun magazine and the quilt she made for it is ADORABLE! I can't wait to get my hands on one. Congratulations Camille... You deserve it!

Friday, January 16, 2009

Finishing Touches - Day 5

Last Day of Finishing Touches... I promise!
In our Kitchen, I basically had to convince my husband and our builder that black and dark oak cabinets would actually look good... or at least I think so. They were trying to convince me that the bottom cabinets needed to be a shade of white if we were going to have them painted. I stuck to my guns and am so happy I did.... they even started to see my vision once it was completed. I love the way it turned out and would not change 1 thing.
I love accenting with white dishes... I think it is just so simple and elegant. They go with just about everything and no matter what the occasion, you can always add a splash of color with other things like linens and other decor.
I really enjoy displaying my great grandmother's doilies that she made. I never met my great grandmother as she lived and passed in England, but my grandmother did give me a few of her cherished handmade doilies. I also did get to talk to her once on the phone when I was a little girl and I still remember her british accent. She did such beautiful work.
Our breakfast room...
Paige and Matthew's little table and chairs that I recovered in the red dottie vinyl coated fabric by Moda Home.
I also re-covered these chairs with a faux leather... much easier for spills.
In our old house I had made some long drapes for our living room and this house the windows were too high. So... I repurposed some of the drapes into these kitchen curtains...
I was able to use two of the panels as they were in our dining room. The rest of the fabric I re-purposed into pillows for our living room so that all three of the main rooms coordinated in some way.
Our dining room and entry...
Another one of my great grandmothers handmade doilies that sits on our dining room table....

Thursday, January 15, 2009

Finishing Touches - Day 4

Remember when I moved my office to our Study and I mentioned that my kids were getting a playroom? Well... this is their playroom finished on New Years day.
Really the only handmade thing in this room are these pillows. I bought the panels for the windows and got one extra to cut up to use as the pillow flange and back. For the middle of the pillow I used the fabric 26 Letters by Moda Home. I bought this fabric years ago hoping to use it in my kids playroom whenever that happened... and finally was able to use it. I have some coordinating fabrics that I plan to make a quilt for their couch in the future.

BTW... If you are ever looking for a miniture sleeper sofa for kids... IKEA has a great one and is very inexpensive. It says that it is a dark grey but is actually more like a very dark denim. I am very please with this purchase. The kids love it too!

Wednesday, January 14, 2009

Finishing Touches - Day 3

Some of my favorite things about our house is the handmade things that went inside the house.
This window (there are actually 2) is probably one of my most favorite things in the house. Custom designed by me and Handmade by my mom. She did an excellent job on these and I am very proud to have them in my house. She is a very talented lady.
From the outside of the house, the windows can be seen here...
From the inside of the house, one of the windows is located in our laundry room/mudroom.
I was actually very excited the way our laundry room turned out because I had just enough room to put three of the collapsible laundry baskets... great for sorting clothes.
The other window resides in our master bathroom shower just as you walk-in.

Paige's bathroom...
TIP: If you want to dress up a hanging votive holder... add some hankies. My sister gave me this wall hanging votive/flower/whatever holder from Canton. BTW... Canton is a HUGE flea market in Canton, TX for those of you not familiar with it. It came without any votive holders just round rings attached to the decorative metal wall hanging. So I bought three beverage glasses that angled out towards the top so the glass would not fall through the ring. Added the Summer Hankies by Moda around them and draped the tips downward. I think it gives it something extra special.
Another great TIP: Use a queen flat sheet to make shower curtains. I used the crochet sheet set by Moda Home to match Paige's bedroom. Measure the height you want your shower curtain to be. Layout a Queen sized flat sheet and determine which side you want the top to be (the head or the foot of the sheet). I wanted the crochet detail to be at the bottom of the curtain so I made my rolled hem at the foot of the sheet. Simply make a rolled hem (folding the fabric over twice) the size needed so that when you stitch the hem down at the top and bottom of the rolled hem, the finished size is the height you need. All the other edges are already finished, so all you have to do is add grommets. Just space the gromments out equally along the top of the curtain about 1 1/2" down from the top. Hang and enjoy! Oh... and make sure you put a plastic liner on the back side of the curtain towards the bathtub so it keeps the water in when showering.

Matthew's bathroom...

Again... with the sheets for the shower curtain. I just love the draping effect that it makes when using sheets. And the best part you can match your bedroom decor very easily! The other great thing with sheets is you can make them any height (well as high as the sheet is). Most shower curtains premade are too short... at least I think so. I like the shower curtain to go above the shower head and just barely rise above the floor. BTW... I never cut any fabric off the sheets when making the shower curtains. The top rolled hem gives the shower curtain that extra strength and stability with the thick layer so the grommets don't weigh down the top.

Tuesday, January 13, 2009

Finishing Touches - Day 2

Here are few of the projects that I completed over the last year and a half for the bedrooms...

The kids bedrooms were my first goal to have finished when we moved in. I actually started planning and working on their bedding and furniture long before we ever moved in so when we did move in to the house, I could just put their rooms together and be done... at least for a little while.

Paige's Room...

I decided to go with pink and brown with antique white accents for Paige's room. Pink is her favorite color. I started off by finding antique furniture that had that girly edge to it and refinishing them in an antique white paint. Most of the furniture I was able to just sand down and then paint. The bed my sister gave me needed a little bit of girly-ness added to it. I added a wood embellishment to the head of the bed and then added curtain rod finnials to the tops of the bed posts to finish it off. Gave it a good sanding and painted it all one color to make it look like it was suppose to be that way.

For the bedding I used all Moda Fabrics in various shades of cream, ivory, brown, and pink and made a patchwork duvet cover. The back side is done in the rose dottie fabric by Moda. Added a ruffle edge to complete the look. At the end of the bed I got a brown velvet quilt by Moda Home and the standard sham to match.

I used the Crochet bedding by Moda Home for the sheets and bed skirt. and then topped it with a rose dottie pillow by Moda Home.
For her curtains I bought some brown silk panels that coordinated with the brown in her room and then made her roman shades out of the rose dottie fabric by Moda.
The dresser was actually the one that I used growing up but was a honey oak color. I wanted all her furnitre to look the same so I sanded it down and painted it the same color as the rest of the furniture. The dresser actually had a large mirror that went with it, but when I got it into the room... well... I wanted a different look, so I opted for this mirror instead.

This piece was actually a fun find. Not sure exactly what it was originally intended for but when I saw it... I had to have it as a little blanket chest for Paige's room. It was originally an oak stained color with a basket weave inlay on the top of the chest and step. I removed the basket weave and sanded down... painted and added a faux leather fabric to the top where the basket inlay was. I went back and roughed up all the edges to give it a worn or antique feel to it. The blanket hanging out of the chest is the Crochet throw by Moda Home.


Matthew's room...
Matthew's room had to be all boy. All of his furniture was actually used by Richie and I when we were growing up. Everything but his bed was Richie's as a boy. The bed I had when I was little. The toys and accessories that decorate his room I found primarily in antique stores or on ebay. The little red airplane rocker, which I found out later is manufactured by the Mandalay Box Company (?), I found on ebay at a local ebay shop. SCORE!

Most of his furniture I sanded down and repainted too. His desk/bookcase is painted black. The dresser I left the original dark brown stained. His night stand and bed I painted a colonial red. All the pieces have been sanded on the edges to give a worn/antique look.
As for his bedding... I bought a navy cordoroy bed cover from Bed, Bath and Beyond and then made a patchwork throw blanket for the bottom of his bed... all made from Moda fabrics. The red dottie throw blanket at the bottom of his bed is by Moda Home. My mom made him the little truck pillow and the brown faux leather pillow is by Moda Home as well. The other pillows are ones I bought.
Then finally came the master bedroom. I have always done some kind of color in our bedroom, but this time I really wanted to keep it very clean and simple, yet have a bit of elegance. So I went with Chocolate and Vanilla.I used the Shangri-la quilt and euro shams in ivory by Moda Home and the accented with a lighter ivory for the duvet and standard shams and pillow from a collection at Linens N Things (which I cannot believe they are closing their stores). I made the drapes for the windows out of a dark chocolate silk fabric and found a chenille throw close to the color of the drapes to lay at the bottom of the bed
Related Posts with Thumbnails