Thursday, October 14, 2010

Homecoming Wrist Mums Tutorial

This week is Homecoming week for our school so to help kick it off.... a tutorial for a Wrist Mum. A friend gave me this idea and I LOVE IT!  It was perfect for little girls that may not want the thing pinned to them all day.  Some mums can get very heavy.


Supplies:
1 Slap Bracelet
1 Small Boa
Rhinestone Iron-on Letters
1 Medium size mum flower
1 small size mum flower
1 Mum Ribbon with your team name pre-printed
1 Blank Mum Ribbon to apply the name of recipient
Assorted spools of ribbon that coordinate with your schools colors and mascot.
Mum accessories such as footballs, megaphones, etc.
Hot Glue Gun with extra sticks of glue
Bonash Non-Stick Pressing Sheet 


Instructions:

Step One:
Lay your slap bracelet out flat.  Cut a section of boa sized to fit your slap bracelet. 
Hot glue the boa to the slap bracelet.

Step Two:
Cut out the letters from your iron-on rhineston letters and place the letters towards the end of the blank mum ribbon.
Using a pressing cloth such as the Bonash Pressing Sheet, fold the sheet over the letters and ribbon and press into place.  This pressing sheet will help protect the ribbon from melting from the hot iron.
Remove the plastic from the letters and you now have some bling for your mum.

Step Three:
Cut various styles of ribbon 12"-16" in length depending on how long you want the ribbons to hang.  These can easily be trimmed down when you are finished glueing everything together.

Step Four:
Layer your Medium and Small mums and hot glue them together.

Step Five:
Turn your flower over and use the plastic bottom to glue all the ribbons and mum extras to by layering ribbon, glue, ribbon, glue, ribbon, etc.. You get the point.

Step Six:
Once you are happy with the ribbons and mum extras glued on, apply a dot of glue to the bottom of the flower and ribbons and glue to the boa side of your slap bracelet.  To help secure the flower and ribbons in place on the slap bracelet.  Fold over a few of the flower petals and glue to the underside of the bracelet.
Flip it over and this is what it should look like.

Step Seven:
Glue on some mum accessories to the center of the mum flower

Step Eight:
Wrap the slap bracelet around your wrist and wear with school pride!


Step Nine:
To give the mum as a gift.... a shirt box is perfect size and will help keep the mum nice and tidy.  Just add some tissue to the bottom and place the mum centered in the box.
 Great way to store the keepsake as well.

GO TIGERS!!!

Saturday, October 9, 2010

Favicon Tutorial

Being a web developer by day {and at times by night}... I am suprisingly shocked that I have never once posted any web developing tips or tutorials on my blog. Go figure. So... without further ado... I give you my first {and hopefully not last} web tip.

This is great to use on blogs that do not allow you to upload your own custom favicon.  What is a favicon? A favicon is the little tiny icon that sits just to the left of the http://... in your address bar of your web browser.  This favicon can be customized to brand your blog or website.

Step One:
Using a photo editor such as Adobe Photoshop or Adobe Fireworks, create an image you would like to use as your favicon.  TIP:  The image resolution should be 72 pixels/inch. The image size should be 32 x 32 pixels square. Save your favicon as a GIF, PNG, JPG, BMP, ICO, or TIFF and must be less then 1MB in file size.

Step Two:
Go to http://www.iconj.com/favicon_hosting.php. Under the title Free Favicon Hosting, click on the Browse button and select the saved favicon image.  Just leave the Sharpen Level to No Sharpen.  Click the Upload It! button.

Step Three:
Now with your Favicon.ico successfully generated, you are given two options. 
A: You can do a Direct Download of your favicon and save the .ico file to your web server if you are allowed to.  Simply follow the instructions they provide to add your .ico image to your website/blog.
B: You can have IconJ.com host your .ico image and link to it from your website/blog by inserting the html they provide into your code.
Option A is typically for the advanced web developer that just needs to generate the .ico image file.
Option B is generally used by the non-web developer that wants to add a more custom look to their blog. The following steps will show you option B and how to install it into your blog code. 

Step Four:
Copy and Paste the code under the title Host It at IconJ.com (Direct Link)

Step Five:
In Blogger, you will need to login to your blogger account, click on the Design tab/link, then click on Edit HTML.

Step Six:
Just before the ending head tag paste the code you just copied from IconJ.com.  It should look something like this...


Click Save Template.

CONGRATULATIONS!
You can now view your blog and see your new custom favicon displayed in the address bar and the window tab.

What's your FavIcon?

Thursday, October 7, 2010

SMILE!

Today is World Smile Day! 


So go and give and Smile to everyone you pass.  You just might make their day.  :)

Friday, October 1, 2010

A Beef Challenge

Tuesday morning after dropping Paige off at school, Matthew and I headed to the doctor's office to finally have his Beef Challenge to see if he is allergic to Beef.  A couple months ago, he had a skin test and Beef came back as a border-line positive result. The only way to truly test if he is allergic to beef is to do this beef challenge.  Oh... did I mention that a beef challenge lasts about 3-4 hours? 

So... quick stop at Sonic to pick up a plain and dry hamburger and then to the doctor's office at 9am.

If you have never had any experience with this, here is the very short version of how it works.  The beef patty is broken up into fourths, each section is slightly larger than the next. {no equal portions} 

9:30am - the smallest portion is given to Matthew to eat.  Vitals checked. Check for hives. 30 minute wait time.

10:00 am - the next size portion is given to him to eat.  Vitals checked. Check for hives. Another 30 minute wait time.

{I think I forgot to mention... Matthew is NOT a big Beef fan in the first place.  So, lots of bribing, making yummy sounds and Cheering when he actually ate all the beef}

10:30am - the next size portion is given to him to eat. Vitals checked. Check for hives. Yet another 30 minute wait time.

11:00am - the final hamburger portion is given to Matthew to eat.  This one was about half of a hamburger patty. Vitals checked. Check for hives.  This was the toughest piece for him to eat.  He DID NOT want to eat this last bit of beef. He claimed it to be "YUCKY". It took him 30 MINUTES to eat all of half a patty.  Then once he finally ate it all, WAIT for 1 Hour.

12:30am - OUTCOME: Matthew is NOT allergic to beef.  HOORAY! 

I have to say, I sure have missed having hamburgers and beef spaghetti and anything else you can eat with beef in it for the last couple months.  Because of this suspicion of a beef allergy with Matthew, I stopped making meals with beef and switched everything we would use beef in to ground Turkey, Turkey Meatballs, etc {you get the point}.  I do have to admit it is a lot healthier to have turkey over beef, but beef is nice to have every once in a while.

Friday, September 24, 2010

A Funky New Pattern

I know we all love the Sock Monkey, but what is the Sock Monkey without all his sock friends?
Meet the Funky Bunch... Hippo, Giraffe, Elephant and Pig.
Even, Sock Monkey is included in the Pattern!  Available now on my Etsy store.

Team Gift Idea

With Paige in Cheerleading now, it is so much fun creating little gifts for her team and friends.  Their first home football game is tomorrow, so I decided to make the girls matching Tiger Waterbottles. 
The water bottles came from Wal-mart and I just used four different colored paint pens to decorate with pom poms {strategically placed over the brand of the bottle} tiger prints, their name, and Go Tigers!
Even her Coach will recieve a matching water bottle... just a little bigger.

GO TIGERS!

Friday, August 27, 2010

A few of my favorite things...

Lately, I have been drawn to products with typography on them.  Here are a few of the items I have found that I {heart}!


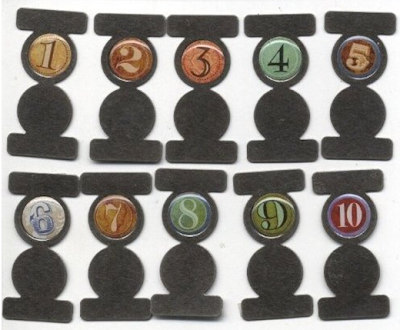
 What great excuses to have some really cool accessories in my house and at the same time for them to help the kiddos learn their alphabet and numbers.

Wednesday, August 25, 2010

1st Day of School and a 25 yr old Dress

Paige started school for the very first time Monday... she is in KINDERGARTEN! I cannot believe it!
She is such a big girl now.  She is so excited about going to school and she loves her new teacher, Mrs. Parker.
 After school, I made her a special treat to celebrate her first big day!  CUPCAKES!
 Or, as Matthew calls them.. "Puccakes".  Matthew is doing well without having his sister as a playmate all day, however he is very excited when it is time to go pick Paige up from school.
Okay... now, I have to tell this story.  This beautiful dress that Paige wore on her first day of school was made by my very talented mother.  It is a BRAND NEW 25 year old dress.  How can that be??? This was the dress that I was suppose to wear on my first day of Kindergarten 25 years ago. You see... my mom started making this dress before I started school in 1985.  She did all the hand smocking and added all the teenie tiny pearls at every cross-section and then stopped.  You all know how this story goes... You start a project... set it down.. forget about it... and then 20 years later when your daughter has a baby girl... she remembers THE dress. 
{5 years ago - Paige is born}
Me: "Mom... you remember that dress you were going to make for my first day of Kindergarten?"
Mom: "Y-E-S?"
Me: "Well... you think you can finish it for Paige for her 1st day of Kindergarten."
Mom: "I think so... I have 5 years to get it finished."

{2 months before Paige starts school}
Me: "Mom... you have 2 months to get that dress done... Paige really wants to wear it on her first day of school." {Yes, I know I pulled the granddaughter card.}

{August 22, 2010 - The Sunday night before the 1st day of School}
Me: "Well... Paige starts school in the morning."
Mom: "I know! She is such a big girl!"
Me: "Did you get the dress done?"
Mom: "CRAP!"
Me: "It's okay... she can wear it to her first day of Sunday School."

{August 23, 2010 - 6:20am - 1st day of School}
Knock at the door... my dad is standing at our front door with THE dress FINISHED!  WOO HOO!
My mom stayed up till about midnight the night before and finished the dress that I was to wear on my first day of Kindergarten so my daughter could wear it on her first day of Kindergarten.  I was sooo excited.  IT is BEAUTIFUL!  I love it and so does Paige.  She wanted to wear it to bed Monday night. 
 Thanks Granny!  You're the best!

Sunday, August 22, 2010

New Pattern! Quilted Nap Sack

This is probably one of my favorite designs I have done. 
These two new designs are very classic and work great for both boys and girls. 
I have made this concept in so many different variations... I just can't help myself. :)
So, go and get your copy today on my etsy site!!!
Enjoy!

Thursday, August 19, 2010

speechless.

So much has gone in the past couple weeks, I don't know exactly how to title this post except that I am just speechless.  We had a wonderful visit from my grandmother and cousins from Nebraska.  The kids learned how to make sock monkeys which was so much fun! I wish they lived closer so the kids could do more things together.

Paige is starting school this coming Monday and am so excited for her and she is super excited that she finally gets to go to school!  YEAH!
She is going to be a Cheerleader this year too which is kind of exciting as well.  She keeps telling me that she is so esited {translation: excited} to be a Cheerleading!  She had her very first cheerleading practice yesterday and loved it!
Matthew won't know what to do with his sister not there to play with him all day. 
He has been going through rounds of testing to see why he continues to get hives and just found out that he may have Chronic Autoimmune Urticaria {an autoimmune disease that causes his antibodies to attack his skin and cause hives.}
So. Exciting things are going on, but then again I am speechless with my little man.  I just don't know what to think about this.. I am thankful we are finding out what is going on with him, but at the same time wish he did not have to go through all this. 
Related Posts with Thumbnails